Show files, folders, and web design

TL;DR:
Talking about templates from one last angle, and ensuring your show files don’t get lost.

The Story:
After I graduated from college, I started working on a number of websites, big and small. This was before things like WordPress and other CMS platforms were out there, organizing your work for you. Back then, you had to be extremely organized – THIS web page contained THAT image file, which was located in a folder THERE. Move that image or web page, and you broke the links and there would be no picture. Everything was located in relevance to everything else.

Computers like this kind of regularity, and so should you. Everything, from web pages to Qlab to Protools, works the same way. Create an audio cue in Qlab, and it is going to look for that .wav file in the same place every time. If you restrict yourself to a rigid file organization, neither you or Qlab will lose things. What’s more, if you have to open media files for editing, you know where they are.

File path in Qlab

As we saw in last week’s sprawling post about my Qlab template, I like to replicate low-level work so I can get into the actual design phase quickly. The other part of my preparation is a system of folders and support files that I know I will need.

The Esoteric Bit:
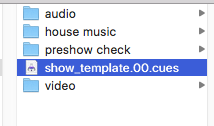
Every time I sit down to start designing a show, I make a copy of the folder that I use as a template:
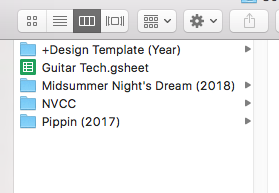
File folder structure
(I put a “+” in the file name so that this folder moves to the top of my list.)

Duplicating this folder gives me all of the directories I will most likely need in an audio and/or video design:
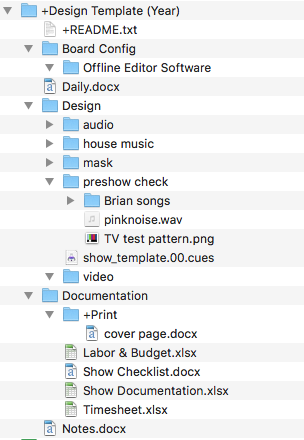
File folder structure

I make a couple of edits, and my show is already started! I have a README.txt file already set for when I archive the show to my drive in the studio (basic info on venue, director, show dates, my job title – top-line stuff I can refer to years later).

As you can see, I have a folder for backups of my board’s save files (so it isn’t just on a thumbdrive….you ARE backing up your board, aren’t you?!?!?!?) as well as the software on hand in case I need to move computers and reinstall it somewhere. Or, in a tour situation, I may need multiple versions for different desks. I have a Daily work list, detailing who is on the calls and what they are doing and broken down by the hour, or whatever is appropriate.

My “Design” folder is where most of the exciting stuff happens – my Qlab file, my copy of the script in PDF format (I abhor paper scripts for the sheer amount of paper I would have to carry around, working on multiple shows at once, and not wanting to duplicate my notes for my board op). This folder keeps my audio and video media organized, with my house music and video masks separate from the rest of the content in the show. I also keep my sound/video check files separate (for system tuning I use the program Tone Generator, but for basic soundcheck I use a .wav of pink noise). This is also where my three favorite songs for sound check are kept.

Just as important to my “Design” folder is my “Documentation” folder. Budgets, plots, cue lists, strike plans, check lists…they all go in here. Admittedly, I spend equal time in these two folders. You’ll notice I also have a “+Print” folder – I hate paper, but I do keep a clipboard or book of documents for quick hand-off access, etc., as well as info for when, as the designer, it is time for me to walk away from the show after opening. I usually batch all of my printing to be done at once, or assign a student to do it for me. This makes it clear what is getting printed (I save my Excel pages to PDF before printing, for a variety of reasons).
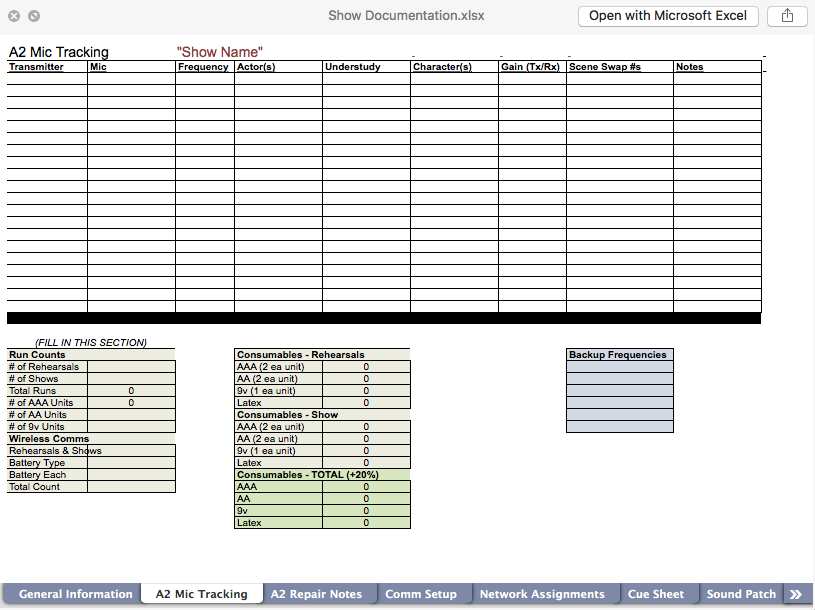
Sample Spreadsheet

Lastly, I have a document for notes, which is that messy scratch pad that gets furious attention throughout rehearsal and then gets crossed off bit by bit. Even this is pre-formatted, ready to go.

Notes page

So, there you have it. All of my files, in one place…well, many places. You see, I use Google Drive (and their download manager) on almost every show I do, which allows everything to sync across my design and show computers. My crew and I have the same files at all times. Computer dies? We can be up and running quickly somewhere else. If the show I am working for insists on Dropbox, well, easy enough. And once the show is done, I can quickly archive my show offline, without having to get the latest version from the board op!

I’ve designed 60-70 shows as I’ve evolved this workflow; I haven’t lost a file yet, and I can call up any of my old shows for reference and everything works (minus whatever hardware). Of course, the best practice at the end of your show is to use the “Bundle Workspace” function in the File menu. But I will be honest with you – I rarely do this, because I like my own organizational structure better than what Qlab’s archive offers, and it is easier for me to find elements and re-use them. Of course, I’m playing with fire, and saying this now opens me up to screwing myself sometime in the future. Knock on wood that it doesn’t happen, but it will be my fault if it does!

What system works for you? Do you spot an area for improvement? Let me know in the comments!

Cheers!
-brian

PS – All of these Excel & Word documents get converted to Google Docs once work starts, and then convert back to their Microsoft formats for archive. Google Docs is unparalleled for collaborative document editing. Also, since writing this post, I have added a folder called “Drafting”, because I have to traffic the scenic draftings as well as my own. And if it’s a little show that may or may not have formal drafting, it reminds me to follow up on it anyway.

What’s in my Qlab show template? (Templates, part 2)

TL;DR:
Speed up your workflow – and your learning in QLab – by making a template. Here is mine.

The Story:
I created a template that I use to start all of my shows, and contains the most commonly used scripts of mine. It isn’t cluttered with EVERYTHING I’ve learned, just something to help me hit the ground running.

I found this also helped me learn more about QLab, faster. While repetition is key, I was able to do bigger and better things if I didn’t have to keep reconstructing the more basic elements. With basics in place, I could focus on making/finding new stuff.

The Esoteric Bit:
The following dive into my creative process will show you a number of scripts and tricks that I will be highlighting and explaining in future posts. It is going to get deep, quickly – but don’t worry, the things you see will all be broken down in future posts. So it’s ok to gloss over a lot of this if you are still new to Qlab.

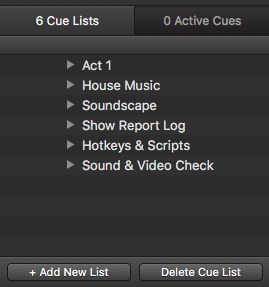
The template that I use to start programming my shows has five different Cue Lists, right off the bat:

Qlab template

Theatre shows are, more often, the more involved programming jobs, at least in terms of organization and timing. As such, I like to break up my work by Act if there is an Intermission. So whether or not this is a play with an Intermission or a concert, “Act 1″ is where I have to start, adding cue lists as necessary. In this “Act 1” playlist, I have the following already set up:

Qlab template

Here, I am already referring to my other Cue Lists. First I have my sound and video check cues. These test all of my outputs for me. All of this gets laid out in a separate Cue List because I don’t want all of that cluttering my show interface. But at the same time, I want to make sure the operator remembers to do it. If there are problems, you can chase them down elsewhere; but by the time the show opens, this process should be refined and hopefully all you need is confirmation that things are working. (I’ll show a sample sound check below.)

Up next is my first show cue, 0.1. This what runs just before the house opens

  • Cleans up any extraneous files from the prior show – show report logs and whatever other things I deem “cruft” at the end of the prior show in the case of multiple performances
  • One last volume adjustment that I laid out in a prior post.
  • Starts the house music.
  • If I am controlling lighting, I will throw an MSC cue in here as well to control the lighting board.
  • If I am designing video and there is a walk-in look, that also gets fired in here.
  • Note that this group fires everything simultaneously (noted by the green square borders).

Lastly, I have a fade cue that fades out my house music because, well, that will have to happen at some point! It will get added to whatever appropriate cue that gets written.

Next Cue List is my House Music:

Qlab template

House music has a lot of song cues that I don’t want cluttering my main interface, so I just use a Play cue in my Act 1 show cue list to target the appropriate group of music. Every audio cue is set to auto-follow within the group, so that one song plays after another. The fade cue I showed earlier targets that whole group as well, so the music will fade out, regardless of what song is playing.

(In a later post, I will talk about the difference of using Qlab for your house music vs. using iTunes.)

The next Cue List, Soundscape, is actually empty in my template. It is just a place for me to put my sprawling soundscapes that I sometimes design – for example, an urban park with occasional bird sounds and passing traffic and other noises that are generated in a weighted random sequence, so as to make it as realistic as possible. Not only do I save a step by not having to create it IF I have some soundscape cues, but it serves as a reminder to cloister these all-too-big nested groups somewhere OTHER than my main show cue list. I then invoke them with a Play cue.

Next up is my Cue List called “Show Report Log”:

Qlab template

I’ll explain this set of cues in the future. They are scripts that may get invoked throughout the show, that mark the running times of each act, and then email the results to the stage manager who, traditionally, was using a stopwatch and a clock. Again, I use Play cues to trigger these, so that if a change is made the scripts themselves are not deleted, in case they are wanted somewhere else.

Up next is my Cue List “Hotkeys and Scripts”:

Qlab template

In case you didn’t know, Qlab allows you to assign Hotkeys to any cue, using any key or combination of keys to call that cue, at any time, no matter where you are in the show.

There is A LOT going on here, and these are basically used as-needed. Again, I’ll do tutorials on these later, but they are:

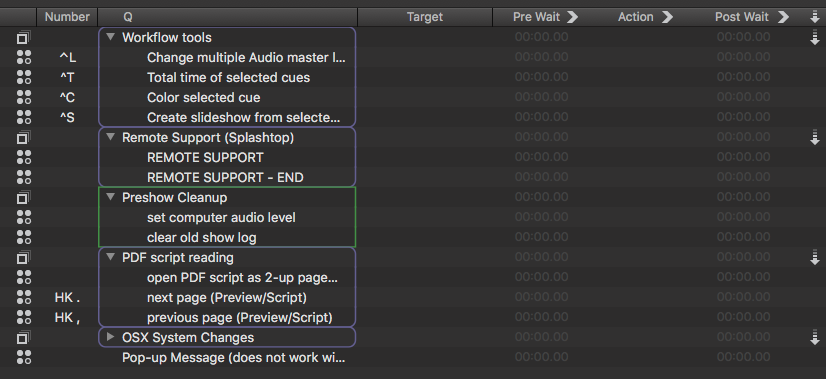
  • Hotkeys to change volume levels on multiple Audio cues, add up the running time of selected Audio cues in a pop-up box, assign a color to a cue (and in the resulting pop-up dialog it’s preset to Red, so that I can quickly flag cues during the run that I want to revisit for problems. I also have a Hotkey to create a slideshow out of multiple images/Video cues.
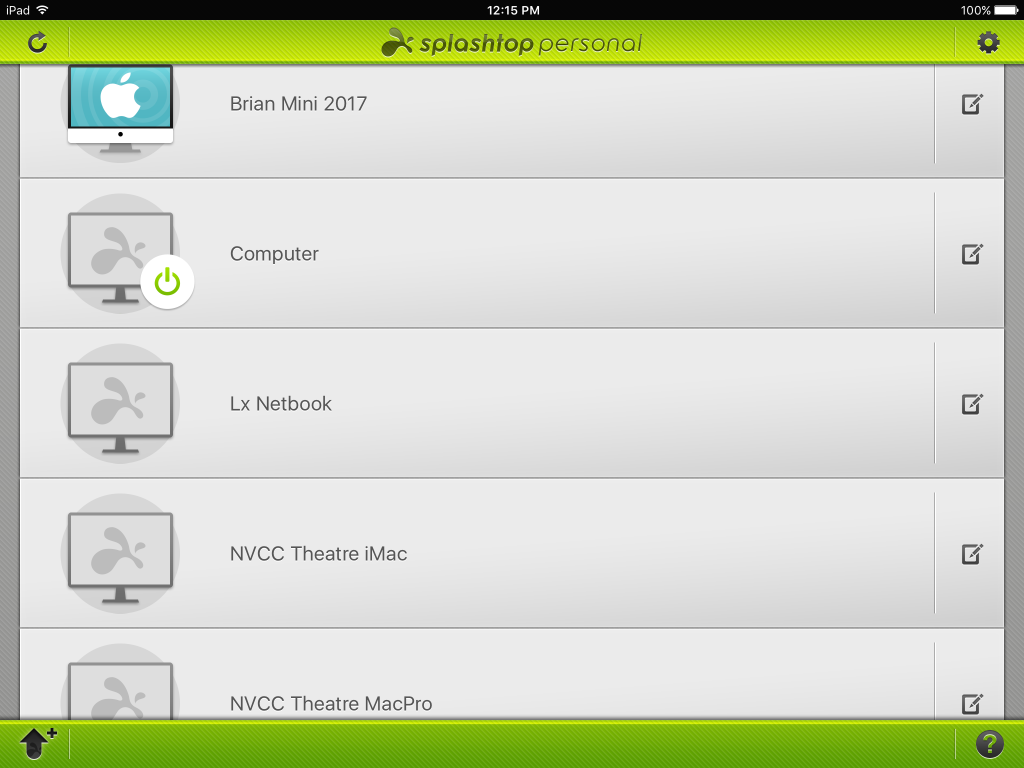
  • I work with a lot of schools, and my students sometimes have questions while working on notes or rehearsals. The scripts in the “Remote Support” group call up the application Splashtop, which I use to remote into the computer and take control of the screen, and also a script to quit the application and release any overhead it is using.
    Splashtop, on the iPad(I can even remote into my show computer to help out while I am on the go, using my iPad or iPhone)
  • This is where the Preshow Cleanup scripts mentioned above (in my Preshow) reside. I keep it separate so I can add to it on an as-needed basis without changing the flow of my shows.
  • PDF script reading is the backend for using a PDF copy of the show’s script, rather than having a paper book next to you. It houses my page turning Hotkeys as well as the script that actually opens the PDF to the right page at the top of the show.
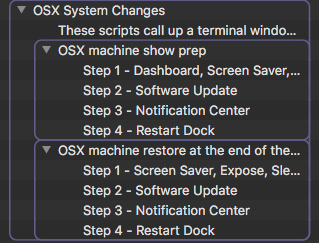
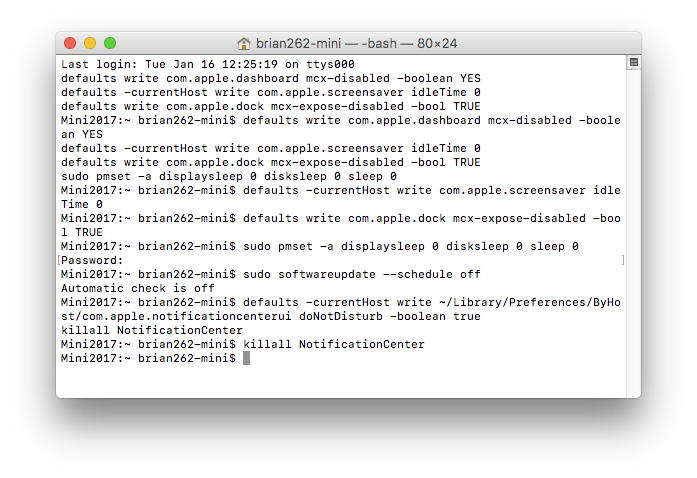
  • I have another group of OSX system changes. There is A LOT of heavy scripting here, mostly OSX Terminal commands, that can prep an Apple computer for running a show – turning off Dashboard, Screensavers, Software Update, Expose, Notification Center, and Sleep functions.
    Qlab OSX System Changes cues
    The cues above look like this in the script editor found in Qlab’s Inspector panel…
    OSX Terminal Window, called up by Qlab
    …and when they are run, they call up the Terminal window of OSX for command-line-level commands:
    OSX Terminal Window, called up by Qlab
    There is also another set of Cues/Terminal commands that undoes all of this, returning the computer to a non-show state, to be executed after the show’s run is complete.
  • Lastly, I have a pop-up message template. I have begun using the prior scripts to turn off all Notification Center messaging, so this is getting phased out. But between pop-up messages and text-to-voiceover announcements, I’ve been researching ways to give myself or my operator notes for those little shows that don’t have a proper stage manager.

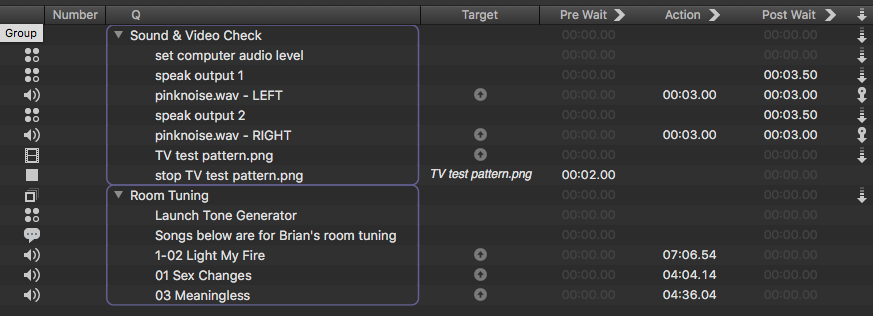
At least, we get to the Sound & Video Check Cue List that I mentioned at the beginning of this post:

Qlab template

Again, we will go through some of this later on, but here is what is happening in my Check:

  • This template caters to those shows that use the stereo headphone jack output from the computer. If I am using a proper interface, then I have other scripts that I would use.
  • The audio output level is set, as described in an earlier post.
  • Text-to-voiceover announces what output (Left, in this case) is being tested.
  • Pinknoise is played for 3 seconds and then stops
  • This is repeated for the Right side.
  • A video test pattern then plays. In this template, there is only one video surface in Qlab, but if I had multiple each would be tested individually, along with text-to-voiceover notes describing what is happening.

The last group in this tour of my show template is my collection of audio that I use to tune the room after load-in. I use the program Tone Generator to playback white and pink noise as I EQ the system. I also include three songs that I know represent a wide swath of sounds – each one performs a different function to my ears (stereo split, high and low end, and overall thick-sounding mix). If I can make these sound good, I know I’m probably going to be ok.

So, now you can see the nuts and bolts that I start every show off with. Again, this will be a launching point for future posts, but I hope it has been helpful to see how much this program can make your design life easier.

Next week, we’ll talk about file and folder structure, and my personal workflow, and how working on website design helped me.

Cheers!
-brian

Qlab templates, part 1

TL;DR:
Make a template of a show with all of the common scripts and cues that go into it.

The Story:
After I did a couple of shows with QLab, I quickly saw that there were a number of things that would repeatedly be useful, like my post about volume control. I was also learning new things quickly, and wanted them accessible. Now, years later, I use a lot of code in my shows, and don’t want to have to re-create my workflow every single time.

Qlab itself does not have a template feature, but I wanted a way to have a file I wouldn’t accidentally overwrite every time I wanted to start designing a new show.

The Esoteric Bit:
Here is a cool, under-utilized feature of OSX that can make this a real template. With your file closed, highlight it in Finder:
Qlab template

Now, right-click/control-click and selection “Get Info” (or type Command-I):
Qlab template

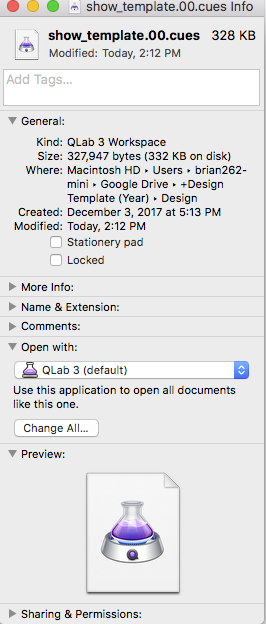
See the checkbox labeled “Stationary Pad”? Yeah, I didn’t know what that was either, for years. But, turns out that with that box checked, every time you double click to open your file, it actually DUPLICATES the file, preventing you from overwriting it. Neat!

I’ve used this on Word documents as well, creating run-of-show documents that I didn’t want to worry if I or someone else would open and forget to click “save as.” It works on all document types.

Next week, I will show you what goes into MY Qlab show template. That’s gonna be a deep dive, so make sure you stock up on the popcorn before next week.

Cheers!
-brian

ALL THE VIDEO STUFFS

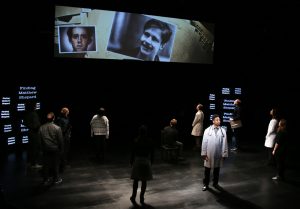
The following is an email that I sent a couple of years ago, when I was advising on the video design for a production of Laramie Project. This is typically a video-heady show, and they wanted to incorporate some live cameras in the show, as well as learn Qlab. I still get a lot of the same questions about video production on stage, so when I found this diatribe, I thought it would be worth sharing here on the blog.

***

Ok, so I’m going to drop a bunch of science on you regarding video on stage:

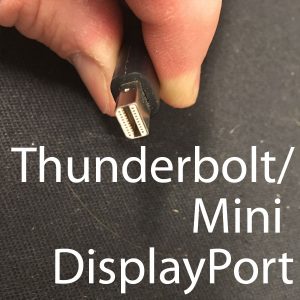
Right off the bat, in trying to do this on a shoestring, as well as the easiest way to do it, is if you already have one of the new Mac Pro Towers. They are expensive but powerhouses, so you may or may not have one available, or lying around in a design studio. Qlab only runs on OSX. It will manage video playback and live camera feeds, all in one place, with custom geometry, etc, to be displayed on an number of “surfaces” (LCD screen, projector, etc). All it does is route the inputs/sources to destinations, and has a friendly Go button so anything can happen or change in one fell swoop, chained together however you want it. The Mac Pro comes into play because of the video outputs – HDMI and Thunderbolt – which is basically mini Displayport, in terms of video (the high throughput of this port means you can put other high octane devices on there, like video converters, drives, etc. So to avoid any confusion if you read something else…it’s more than just for video). Out of the box, it will support three 5k displays, or six Thunderbolt displays of lesser quality. (5k is basically the current top spec out there.)

So, if I recall our conversation, you have two video screens/TVs, a projector, and another one or two video “surfaces” for effects. So a full version of Qlab and a Mac Pro would handle this, given other details…

Video is a maze of codecs and types, but here are some facts to know:

  • There are digital and analog feeds.
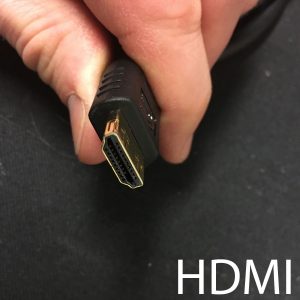
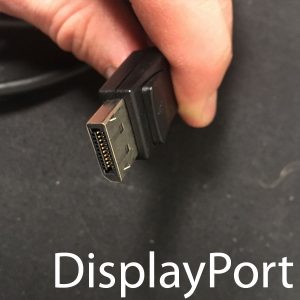
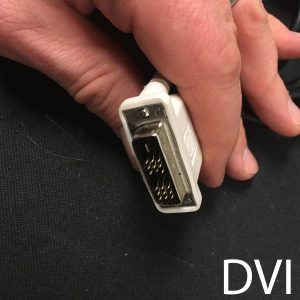
    • HDMI and DisplayPort are digital. (Unrelated fact: most of the standards also can encode audio with those two feeds as well – at least 5.1 surround, if not 7.1 as well.) DVI is another connector found on some computers, which looks sort of like VGA below, and can be digital OR analog, depending.
      HDMI CableDisplayPort CableDVI CableThunderbolt, Mini DisplayPort Cable
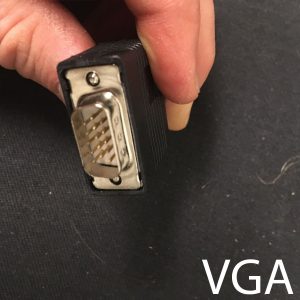
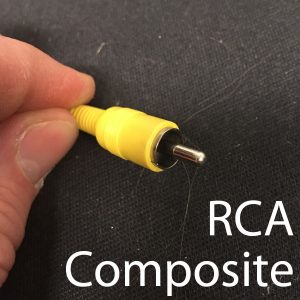
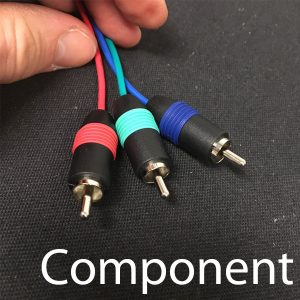
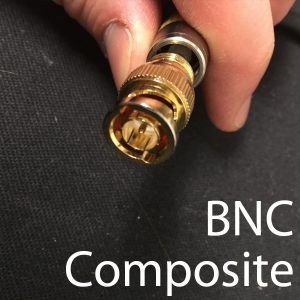
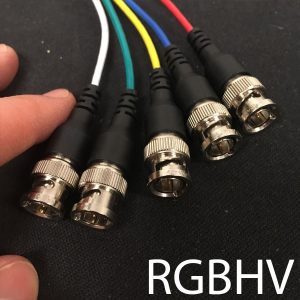
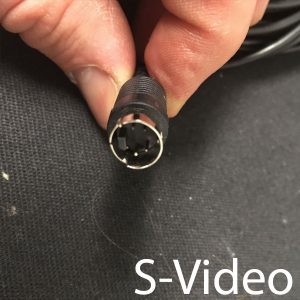
    • In the Analog realm, you have VGA (normal computer), Composite (single yellow RCA plug), Component (three RCA plugs, Red, Blue, and Green, I think, which split up the RGB signal but also contain synchronization information…you might have seen this with your Playstation 2, still high quality), RGBHV (uses five BNC connectors, spits signal into RGB, plus Horizontal sync and Vertical sync), S-Video (which basically no one uses, or ever used, but it’s there as its own weird multi-pin cable, and it’s about the same as Composite without the convenience).
      VGA CableRCA CompositeComponent CableBNC CompositeRGBHV CableS-Video Cable
  • You think “Digital, great, what could be better, just use that!” Wrong. Can only go about 15 feet before the signal stops and you have to use a signal amplifier. Which is why you can’t find easily cables longer than that. While it is true you can go longer than that, it’s either an active cable or called something like that, which helps to amplify the signal. Or it is one of the newer specs coming out. Digital only goes for so far. Then, instead of degrading quality, it just drops out. Not enough bits? No picture. Analog, on the other hand, can run really far (100′ is common for VGA and RGBHV), and past that you just get diminished quality.
  • You can, however, run video over ethernet. Analog and Digital both allow for this and there are extender boxes available to convert.
  • Different specs top out at different outputs. Composite video, for instance, tops out at 480i (think DVD) whereas HDMI can give you 5k, and VGA can give you a whole wide range of output, it comes down to the encoders at that point. Furthermore, on VGA, it can be the same as the RGBHV mentioned above. So basically, RGBHV and VGA can be same thing, just different connectors. They work the same way.
  • I mentioned custom geometry above. Qlab makes it crazy easy to make a video surface into whatever shape you want, just click and drag, voila, you have a trapezoid or whatever that matches your masking and angle correction.
  • Wireless video…it’s very expensive to try and cut the cord. Sync & lag issues are huge, and I am not aware of any standards out there for wireless video feed yet. Don’t do it.

So, look at what hardware you have on hand. What does the projector support, the TVs, etc. Look for what you have in common. The great thing is, going back to the MacPro tower, is that there are dongles that adapt from Thunderbolt to a lot of different feeds. But, we have more things to consider:

  • Yes, you can run multiple videos at once on one machine. But know your codecs – some are power hungry, once you start playing a few different things and decoding them, it can become important what codecs you are using before things start slowing down. (h.264, while great for video streaming because of its file size, requires a lot of decoding and more system resources than, say, an uncompressed 422 video file. Further complicating things, the bigger the video file (like, longer videos) you can get bottlenecks in other ways. So it’s a matter of picking your codecs that work best for the situation.) Similarly, WAV & AIF audio files are way bigger than MP3s, but are better for live use because there is zero decoding involved.
  • Qlab prefers video encoded as “ProRes 422 proxy”
  • Once you know what you are dealing with, if you need to go with hardware video switchers, that will help figure out what you need. Extron, Folsom, there are a bunch of companies. Depending on how graceful you need the switching to be will change your cost. The more inputs and the more transitions will obviously drive the cost up vs something that handles, say, just RGBHV and cuts cold between sources.
  • You want camera feeds. Well, as we know now from studying the amazing NIN tour, the Kinect camera is a popular PC-connectible cheap camera for tours. High resolution, wide angle lens, cheap. But they use a proprietary connector, and I don’t know anything about how they get used in that environment. USB and Firewire cameras work, out of the box, with Qlab. And you can apply real-time effects and custom geometry. BUT…like digital feeds, USB won’t go further than 15 feet without an amplifier (neither will Firewire – notice a trend?). Plus, adding something like a USB extender will add to the lag you may already get from USB. So your camera subject has to be close to your computer, in that scenario. More on what cameras are supported, like Blackmagic video boxes, etc, click on http://figure53.com/qlab/docs/camera-cues/.
  • If not USB/Firewire cameras, then you’re probably looking at Composite, Component, S-Video and RGBHV connections. I don’t know what the digital connections are for cameras these days outside of Firewire, which is phasing out. There’s encoding and stuff going on there…it gets really hairy for someone like me who doesn’t do IMAG, etc every day!

Here is an idea for cheap video and multiple sources, if you don’t have a MacPro Tower or whatever. You can connect each source to its own computer, connect all of those computers on a network, and send MIDI or OSC commands over the network to trigger the videos to play – or anything else you want the computer to do. This gets us into cascading commands, like your main Qlab computer sending commands to other Qlab computers, run applescripts…really, the possibilities are endless once you go down that rabbit hole. This includes finding the closer source for your video camera mentioned above…maybe even apply realtime effects on a USB camera… That was how I did Wizard of Oz using live video feed “behind the curtain” and made him green and bloated – just controlled the camera feed of another computer remotely via MIDI commands to another computer that was located backstage. Obviously, the other nice thing about using Qlab is that any lighting board that has a MIDI port can then be slaved into the system, so your lighting and video cues work on the same Go button. And that can be fired from either place.

I would love to get a tour of whatever you guys end up using! Let me know what else I can answer.

***

This show ended up with a lot of screens, most being on the same feed and duplicated for effect. There were stacks of smaller TVs on either side of the stage, with a large, wide projection screen along the top. There was a live camera feed, which was driven by a shoulder-mounted “reporter camera” with an umbilical running off stage. Combined with effective use of strobes for the camera flashes in the news segments, it was an effective application of tech to an important play.

Past few months of shows…

We here at Rocktzar have been SWAMPED for months. The garden is full of weeds, the blog has been neglected, and I’m pretty sure that was once a cheese sandwich that I chiseled out of the fridge.

Mary and I worked together on a few shows this summer, mostly as props & sound, respectively (though she got a reprieve and joined the pit orchestra at one point, when they learned that she is capable of sight-reading on piano, on the fly). It was lucky we were on the same shows, or we wouldn’t have seen each other for two months.

Unfortunately, much of the summer was also overtaken by a flood that took out a huge chunk of our recording studio, Echostation. We came back from running a photoshoot to find that an errant washing machine had flooded upstairs, which meant the studio ceiling was collapsing on top of the piano, guitar racks, mics…everything. From a gear standpoint, we were EXTREMELY lucky, as only my primary guitar suffered damage, and that was only in the finish. (That guitar has 10 years of touring rigor on it, and I took care of it in that time as best as I could. Living home in the studio now, and wham, big crack in the finish.) Everything else of value has been repaired. But the cleanup resulted in a bare room, stripped of ceiling, flooring, and insulation. Insurance has been taking care of it all, but it’s been a long road back. The results and upgrades are beautiful, though. Photos to come!

Ironically, the day after the flood we went ahead and allowed a film crew to shoot interiors for a movie, taking over the house, yard, and street. We couldn’t let down the producer, our dear friend Miriam Naggar. So we all pitched in and made it happen. To her credit, she was appeared completely un-phased and took it all in stride.

We just wrapped up on a production of A Chorus Line at the University of New Haven, helping out our esteemed friend Brandon, who was having surgery and therefore unable to finish the set build. Suddenly Mary was filling the role I had worked in a couple of years ago, and I went in to help and visit with some of my former students. Falling on the heels of my season at NVCC, it meant I had been in tech for 30 days, solid! It feels good to sleep again…

This week marks not only Thanksgiving, but the start of tech for A Christmas Carol, for New Arts in Bethel, CT. Attentive readers will recall that I worked on this show last year as Master Electrician. This season, Mary is Prop Master, and I am stepping in for Qlab programming, adapting the show from its initial run at the McCarter Theatre at Princeton. That’s all I am able to do, as I have to design lighting for three shows in the town of Fairfield and help manage technical production for a different run of A Christmas Carol in Stamford.

Hope you have a great holiday!
-brian

Setting computer system volume

TL;DR:
Setting the computer’s headphone output volume so that it’s the same every time, using Qlab.

The Story:
There are so many things to set and remember at the top of a show. Volume settings for your computer shouldn’t have to be one of them.

Scenario One: You’re running the show on a laptop which also happens to come home with you after rehearsal. You’re playing music on your headphones, or programming more sound cues, and you change the volume so you don’t blow out your eardrums.

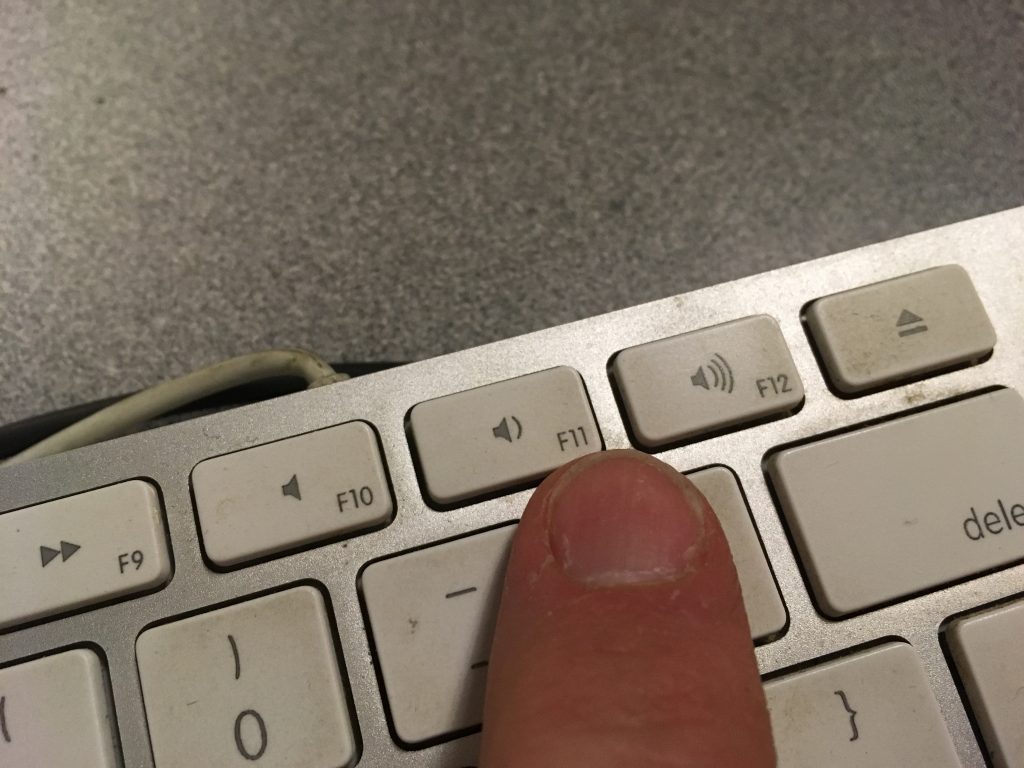
OSX volume control

Scenario Two: Your playback op always checks the computer volume before the show, but doesn’t always put it back to the same level – just to where “it should be good enough.”

Scenario Three: During a rehearsal, the cast is just marking their parts, and don’t need full volume, so someone just hits the volume on the computer.

Scenario Four: The one person who knows what the levels should be gets hit by a bus.

Every show I design I put in sound and video check scripts, to make sure everything is tested and ready to go. This AppleScript is one of them, to make sure the sound is hitting the board at the same level, every time.

The Esoteric Bit:
Create a script cue, and call it “set computer audio level”.

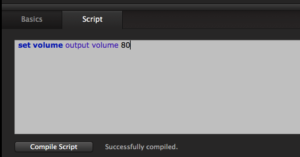
In the Script tab, you’ll enter the following:

set volume output volume 80

That’s it. Literally. There are more complicated ways of scripting this, but why?

Any number from 1-100 will work. Why do I not use 100? Simple – I don’t want to run the risk that any sound will clip coming out of the analog amp of the computer’s headphone jack. It’s all about gain staging, and 80% is about as hot as I want to go.

NOTE: This script only affects the sound coming out of the built-in outputs on your Mac. I design a lot of shows with my Digidesign 003, or other external DAW interface – those levels are not affected by changes in OSX volume control, and instead depend on the levels you set in the output preferences. (But I may still use this script for some other features of my design or soundchecks.)

Run that at the top of your show. Perfect audio levels, as designed, every time.

Cheers!
-brian

A Dummies Guide to Qlab, Part 2

TL;DR:
One more week of introduction to Qlab.

The Story:
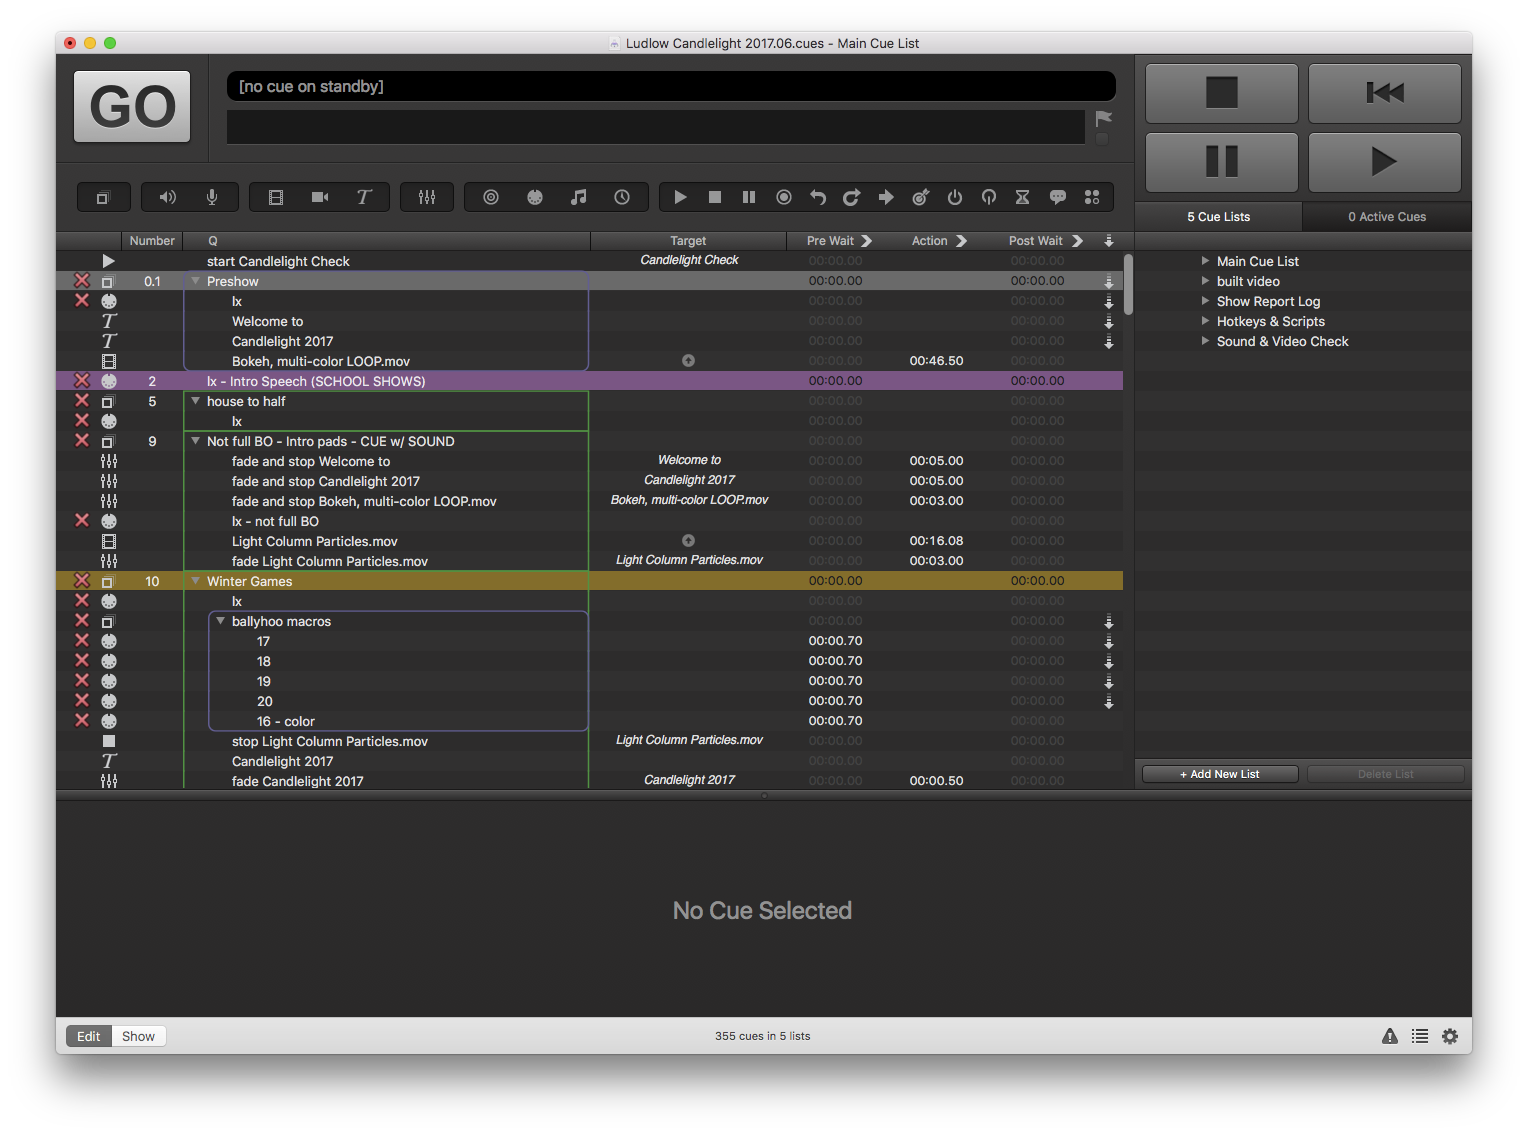
So, now we know what all of the buttons do. Let’s look at the actual Cue List, where we spend much of our programming time.

The Esoteric Bit:
Here is a sample show from a concert I designed lighting and video for:

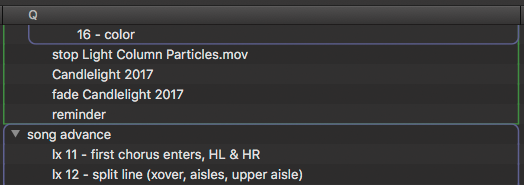
Qlab screenshot
Qlab screenshot

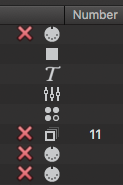
The first column shows us what kind of cue it is, which of course matches the icons we have in the toolbar.

Qlab screenshot
Qlab screenshot

The second column is the cue number. So we can see that cue 0.1 is a Play cue, 1.5 is a Fade Cue, and cues 2 and 3 are audio cues. (To quickly edit the cue number of the cue you have highlighted, just type “N”. Otherwise, just double-click.)

Next we have the description of the actual cue.

Qlab screenshot
Qlab screenshot

These are often auto-named by what the cue is doing, but you can rename these cues as you see fit. (Typing “Q” will allow you to edit this field when the cue is selected, or just double click on it.)

Qlab screenshot
Qlab screenshot

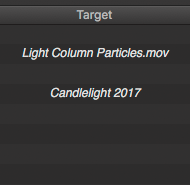
Next column is “Target.” As you might guess, this is what file (or cue) the cue is taking action on. In this example, one cue is targeting the cue called “Light Column Particles.mov” – which in itself was auto-named by the video I dragged into Qlab.

Let’s now skip to the last column – the one with an arrow.

Qlab screenshot
Qlab screenshot

This is your continue column, and has three states. Qlab will allow you to click this field once to make the cue “Continue”, and twice for “Auto Follow”. It can be confusing, but extremely powerful. Here is the breakdown:

  1. No Follow (empty, as shown) – Hit GO and cue fires, plays and stops when it is done.
  2. Continue (downward arrow) – Hit GO and cue fires and plays, but also immediately fires and plays the cue following it. (Example: “play audio and video cue simultaneously.”)
  3. Auto Follow (dot with downward arrow) – Hit GO and cue fires and plays, and upon finishing, fires the next cue. I like to think of the dot-and-arrow icon as like a “Stop sign, then proceed” image.
Qlab screenshot
Qlab screenshot

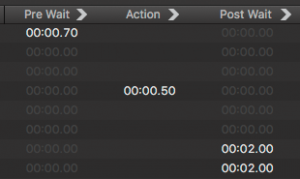
Now, back to the three time columns. The middle one, Action, is the duration of the cue. So, we can see in this example, the fade is one half second long – 00:00.50 of a second. Pre-Wait and Post-Wait are two sides of the same coin. Enter a time in the Pre-Wait, and the cue will delay that long until firing. Enter a time in the Post-Wait field, and Qlab will pause advancing until that time has elapsed.

Combined with the Continue/Auto Follow commands, and you can imagine a lot of cascading effects. Hitting GO once can start a music track playing and send a MIDI command to the light board simultaneously, and then play back images during certain points in the song, and finally start playing another song immediately after the first one finishes, without having to hit GO again!

Next week, we will skip ahead of these beginner’s guides to a useful Applescript that I program into every single show I do.

Cheers!
-brian

A Dummies’ Guide to Qlab, Part 1

TL;DR:
QLab is for more than just playing back audio and video files – and easy to use.

The Story:
I use QLab for almost all of the live shows I work on these days. Even if it isn’t totally necessary upon first look, it provides for me a unified user interface as I cut across from city to city designing and running different shows and in different departments (lighting, sound, video).

As a designer in the college space, I make sure that my students become well-versed in this multi-tool of an application. My goal as an educator and advisor is to help them grow their critical thinking skills, so that they are empowered to make decisions and be stakeholders in the production.

The Esoteric Bit:
While this is documented in many places elsewhere, a brief run-through of the QLab interface feels required prior to launching into the years-worth of tutorials that I have been writing.

At the time of this writing, I have not switched to version 4, which came out only a couple of months ago. Switching versions in the middle of the season doesn’t seem like the smartest move at the moment! However, much of what I will be covering will extend ahead to version 4, as well as back to version 2. (I’ve seen version 1, and have it on one of our older machines here at NVCC…I don’t even think you can get it to install anymore, so we are completely ignoring that one. 🙂

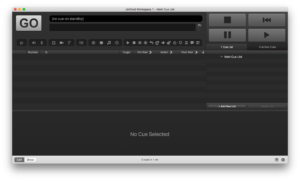
Open up the program, and you are greeted with the following interface:

Obviously, the big “GO” button is what fires a cue. It is also triggered by the Space Bar. To the right are a bunch of familiar-looking controls. Honestly, while in tech rehearsals I only use the Pause button, and the Escape key on the keyboard – which is called the Panic Button – to stop all currently running cues and media. (Hitting Escape once will fade everything out in a time that you can set in Settings; default is 3 seconds. Hitting it twice stops everything immediately.)

Jumping down past all of the icons, there are three areas. The first is the Cue List – everything that you program goes here. It happens sequentially, one thing after another. To the right are two tabs – one displays your different Cue Lists (oh yes, you can have more than one!). The other tab is what I leave showing during my run/rehearsal – it shows running times of your Active Cues. It can toggle between elapsed time and time remaining. I only use the time remaining view, because that is much more valuable information to me.

Along the bottom is a large, changing space called the Inspector. Most applications have an area like this. This is where you can get to the details of an element in your design. Command+I will show and hide this area.

At the very bottom right, there are two buttons – one shows and hides the Cuelist/Time Remaining tabs. The other puts you into the show preferences. That’s a deep, deep dive, and we won’t hit that just yet.

Qlab Edit/Show toggle

At the very bottom left, there are two buttons labeled “Edit” and “Show”. Edit is what you build your show in, and clicking on Show will basically clean up your workspace, leaving you just with the icons and fields that you need.

Now, what about all of those icons along the top?? Well, many are self explanitory, and I’ll go through the ones I am slated to cover the most in the next few tutorials. They are, in order:

Qlab group icon

Group (squares icon) – Think of it sort of like a folder – you can group events together, and manipulate them together.  Over the course of the next few months, we are going to cover three of the four kinds of groups – normal groups that really just organize, “play all” groups that fire everything inside of the group simultaneously, and random groups, which will play only one item inside of that group, chosen at random (not nearly as useless as it sounds 🙂

Qlab audio icon

Audio Playback (speaker) – This creates a cue that will playback an audio file. Same thing happens if you drag and drop an audio file into the Cuelist.

Qlab mic icon

Mic (mic) – an intriguing feature that lets you control microphones. But only ones that are directly connected to the computer. So…yeah…so far, completely useless to me in the live environment. (Though, as I write this, I can imagine using it during a live Skype call with an audience…I’ve had to hack together plenty of events like that…)

Qlab video icon

Video Playback (film strip) – This is just like the Audio Playback cue, only for a video cue. Drag and drop also works to create these. PLEASE NOTE: Qlab refers to all visual playback as “video,” regardless if it is a still image or an actual video file. (We will cover file types in another post.)

Qlab camera icon

Camera Feed (camera) – much like the Mic cue, this controls only cameras directly connected to the computer. But, this is more of a realistic circumstance, as there are many video capture cards out there that make this feasible to use. In a later post, we will be talking about live camera capture and how you can make your projection designs really come alive!

Qlab titles icon

Titles (T) – This is an improvement over v2, which didn’t have Titles offered. How many times have you wanted to just put some text up on a screen? Usually you have to use PowerPoint or Keynote for this kind of thing. Now you can create titles directly in Qlab!  However, the text handling is not nearly as powerful, and I’m hoping v4 addresses this. Despite this limitation, we will have a few posts about the power of the Titles cue and how it can work for you.

Qlab fade icon

Fade (mixing console faders) – This cue allows you to apply changes to your cues – from controlling volume, transparency, special effects, size…anything that you want to change in real-time. If you have an animation editing background, sort of think of it like “tweening”.

Qlab OSC icon

OSC (target) – OSC, or Open Sound Control, is a language/protocol that some devices speak and Qlab can communicate in this language. Use this to send commands in this protocol to a specific device on your AV network.

Qlab MSC icon

MIDI – MSC (MIDI plug) – Like OSC, Musical Instrument Digital Interface is a protocol that some gear uses. You’ve probably seen this plug on the back of a keyboard. But it also is available on the back of some lighting boards, audio rack gear, and much more. You can send commands to equipment, other computers, or even software on your computer, to make changes and otherwise control it from within Qlab. This cue is specifically for MSC, or MIDI Show Control, commands.

Qlab musical MIDI icon

MIDI – Music (musical note) – Different from MSC, it is another kind of MIDI, possibly the original format. (More on this later; for now, just trust me it is different.)

Qlab timecode icon

Timecode (stopwatch) – You can sync with other devices and software using Timecode. Don’t worry about this for now, but if you have a video background, you have seen this.

Qlab play icon

Play (play button) – Yes, hitting GO will play a cue. But sometimes you want to skip around, or otherwise refer to other cues/items, and target something elsewhere in your show.

Qlab stop icon

Stop (stop button) – Stops a cue that does not otherwise have a stop command addressed to it. Don’t worry, we’ll get there…

Qlab pause icon

Pause (pause button) – Pauses a cue. Yes, you have a big pause button on the top. But that’s for rehearsals. To program a pause, and have it only target ONE cue, this is what you’d use.

Qlab load icon

Load (circle with a dot) – Think of it as pre-loading a cue. This one is a rabbit hole, but it has helped me fix issues where system overhead was an issue.

Qlab reset icon

Reset (curved arrow) – Don’t worry for now. Getting esoteric here…

Qlab devamp icon

Devamp (circular arrow) – If something is looping, devamp stops the loop, once it has reached the end of the pass it is currently playing.

Qlab goto icon Qlab target icon Qlab arm icon Qlab disarm icon

GoTo (arrow), Target (bulls eye), Arm & Disarm (Power On & Off) – We are really getting into the weeds here on our first post. Skipping for now. But, like Target and Load, they will become self explanatory when we get there.

Qlab wait icon

Wait (hourglass) – sometimes you need to put a specific length pause into your programming. Another “trust me, we’ll get there” feature.

Qlab memo icon

Memo (speech bubble) – A bit under-utilized, you can leave notes for the person running the show here.

Qlab applescript icon

Applescript (four dots) – I don’t understand why this icon looks the way it does, v2 had a little script icon, but I digress… This is where you can program in Applescript, a very powerful programming language that can control every aspect of the OSX operating system. We will be spending a LOT of time on this one over the coming year. Technically, I believe you can use other languages in this cue as well.

Want more information about the Qlab interface? Figure53, the makers of Qlab, have a great manual, located here: https://figure53.com/docs/qlab/v3/general/getting-started/

Cheers!
-brian

Why Qlab?

TL;DR:
Qlab is supposedly a powerful application – but why is Brian spending a year to write about it?

The Story:
As anyone who has worked with me on a live show will attest, I am a HUGE Qlab junkie. I try to use it for everything – partly just to test the limits of it as an interface for everything. I cover a lot of ground working across audio, video, and lighting on productions of all sizes. So, consistency is a nice luxury. I like to say that it does everything for me except make coffee at the beginning of a work call (which, with a networkable coffee maker, that would be TOTALLY possible).

The Esoteric Bit:
In last week’s post, I presented a number of topics that I will be covering. Most, but not all, were related to Qlab (let’s be honest, almost all of the rest are related to the work I do around Qlab!) But what are some of the scenarios where I am/have used this program, which is often associated with audio & video playback? Why should you care? Imagine these scenarios where I have used Qlab:

  • Designing digital scenery during a schedule crunch and manipulating video content in real time, saving on re-rendering
  • Syncing audio, video, and lighting cues, or supplying power to audio practicals without having to add “empty cues” to the lighting team
  • Generating automated show reports that are emailed to the Stage Manager immediately after the show, with all of the times that they would have had to use a stopwatch or clock for, thereby freeing up their focus and time
  • Automating sound check so that the engineer has more time for other duties, or to ensure that no matrices are missed
  • Creating an entire backup band in a box, complete with video projections and MIDI triggers
  • Giving a countdown timer and 5/3/1 Minute warnings to corporate event speakers
  • Use a PDF copy of your script marked with all of your cues, and reading it and flipping pages while still running your cues.
  • Taking a photo of the band’s set list with your phone in the dressing room, and have it pop up on your laptop screen when you get to the FoH mixing position, along with your mixing notes for those songs, the archive recording of the show is rolling, house music fades out, and the band’s stage computer with the backing tracks starts.  All with ONE button.

So…yeah. That is why I’m writing these tutorials. Next week we’ll do a basic run-through of the interface, which I give all of my students, just so everyone reading this is up to speed.

Cheers!
-brian

Qlab tutorials are coming!

Good morning! Starting next week, we are going to host a series here on Rocktzar.com, all about using Qlab in your show (with a couple of other production tips and topics thrown in along the way).

Over the course of the next year or so, there will be weekly posts on how you can better program your shows and get the best integration possible with your other departments. We’ll cover some basics, but we’ll spend a lot of time under the hood, as it were, working on more advanced concepts than just playing back audio and video.

Part of my goal is to create a resource for my students to use, in conjunction with partnering with my older/more advanced students. Here are some topics that we will be covering, in no particular order:

  1. Qlab introduction and how to start for free.
  2. Creating a template for your shows; my personal qlab library
  3. DVD player (OS X) controller
  4. Pjlink projector scripts
    • Shutters
    • Power
    • Ip addresses
    • Browser open/commands
  5. Ip addresses intro
  6. Highlight cues and example color codes
  7. Timing cues and using folder types
  8. Countdown timer
  9. Count up timer
  10. Clocks
  11. Text (confidence monitor) and rear masking
  12. Audio codecs
  13. Video codecs
  14. Hardware lessons I have learned
  15. Hardware and software prep
  16. Show report script
  17. Clear show log file/show cleanup
  18. Audio outputs – more than two
  19. Effects routing
  20. Master output effects. EQ room example
  21. Multiple audio busses to the same output (using laugh tracks for example)
  22. Galileo programming and Qlab
  23. Basic Syphon magic
  24. Syphon2network
  25. MIDI primer
  26. MIDI vs msc
  27. MIDI mapping in vdmx and qlab
  28. Vdmx and dance show walk thru
  29. Digital scripts, part 1 – markup
  30. Digital scripts, part 2 – scripting and controlling Preview
  31. File saving and organization
  32. Using multiple playlists
  33. Hotkeys
  34. Yamaha sound desk scene change/triggers
  35. Automated soundchecks with multiple matrixes, using DAW hardware
  36. Mapping video
  37. Band backing tracks in stereo
  38. OS X volume control
  39. iTunes playback control
  40. iTunes playlist vs playlist in qlab
  41. Spotify playback control
  42. Black mask.png tool
  43. White mask.png uses (alternative lighting options)
  44. Qlab video masking
  45. Photoshop batching
  46. Automator file rename
  47. Text files and what they are good for. OS X script to create new like Windows
  48. What else is out there besides qlab and compare
  49. Audio/video effect fades
  50. OSC controller on iPad
  51. iOS apps I use
  52. Spreadsheets to keep it all straight – functions list
  53. Color files in use in finder via AppleScript
  54. Add up times – total length of cues/audio tracks
  55. Clear Cache script
  56. Wifi Toggle
  57. Change multiple Audio master levels
  58. Automator – Create powerpoint from photos
  59. OSX Stacks in Dock
  60. configure ETC Express lighting board for MIDI control

So, as you can see, we are going to be here for a while!  If you think of a topic you would like to see covered, please tell us in the comments.

Cheers!

-brian